Tuesday 10 April 2012

Solve "iMovie Exported AVI is in Poor Quality and Takes Huge Space"

Though iMovie can export AVI, the exported AVI is either in low quality or in large file size. Sometimes, iMovie even cannot export the whole movie project to AVI if the project is a little longer. Worse still, some AVI video exported from iMovie cannot be readable by Windows devices like Windows Media Player, Windows PowerPoint Presation, Xbox media centre machine and Windows Movie Maker etc.
This article just aims to solve all the above problems in iMovie export AVI issue: Convert iMovie to AVI instead of export iMovie to AVI. And Bigasoft AVI Converter is just the right iMovie to AVI Converter.
 
As the powerful iMovie to AVI Converter, Bigasoft AVI Converter can fast convert iMovie to AVI format with higher output video quality and smaller file size. It supports converting all kinds of iMovie output videos in whatever formats like MOV, HDV, DV, MPEG-4, M4V, 3GP to AVI video format. And the converted AVI video file will be compatible with most media devices like Windows Movie Maker, Windows Media Player, PowerPoint Presentation, Xbox media centre machine, PSP, PS3, Wii, Archos, Creative ZEN, iRiver, Xbox and BlackBerry.

Besides converting iMovie to AVI, Bigasoft AVI Converter also enables to convert iMovie output video to MPEG-1, MPEG-2, WMV, FLV, MKV, 3GP, ASF, SWF, VOB, RM, and etc. Moreover, this powerful iMovie AVI Converter also can convert various videos from Final Cut Pro, Final Cut Express, iTunes, YouTube, iPad, iPhone, Apple TV, QuickTime to AVI format.

Step by Step Guide on How to Convert iMovie to AVI
The following will describe a step by step guide on how to convert iMovie output videos whatever it is in MOV, HDV, DV, MPEG-4, M4V, 3GP to AVI with almost no loss of video quality and smaller file size. This guide also helps to convert iMovie to MPEG, WMV, ASF, RM, VOB and more.
Make Preparation: Free download and run the powerful iMovie to AVI Converter
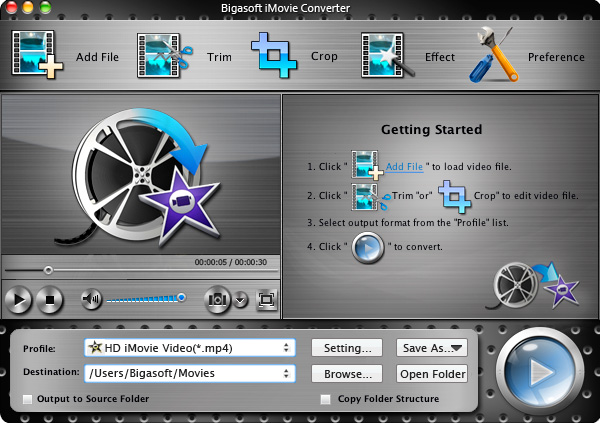
Free download the powerful iMovie to AVI Converter - Bigasoft AVI Converter (Mac Version, Windows Version), install and run it.

Step 1 Add iMovie output video file
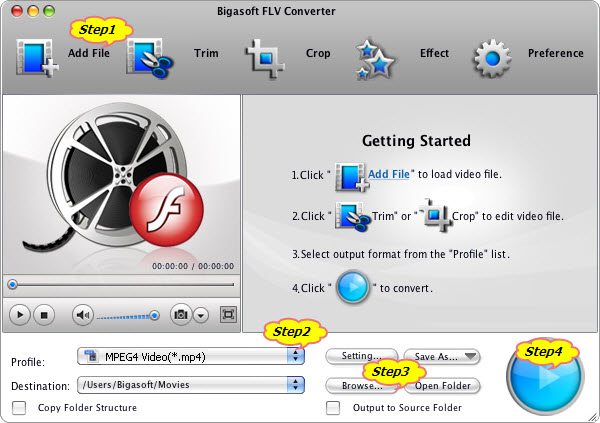
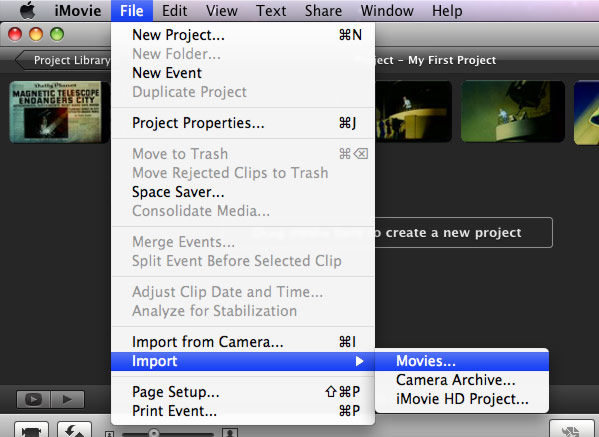
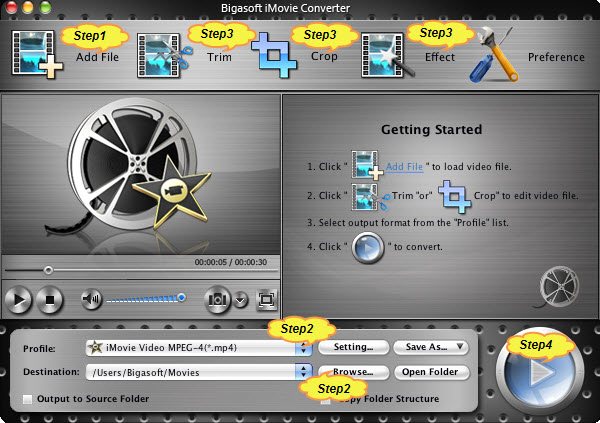
Click "Add File" button to add the iMovie exported non-AVI video file (whatever it is in MOV, HDV, DV, MPEG-4, M4V or 3GP format) to Bigasoft AVI Converter. This iMovie to AVI conversion software also supports drag and drop function.
How to Convert iMovie Exported Video to AVI

Step 2 Set AVI as output video format
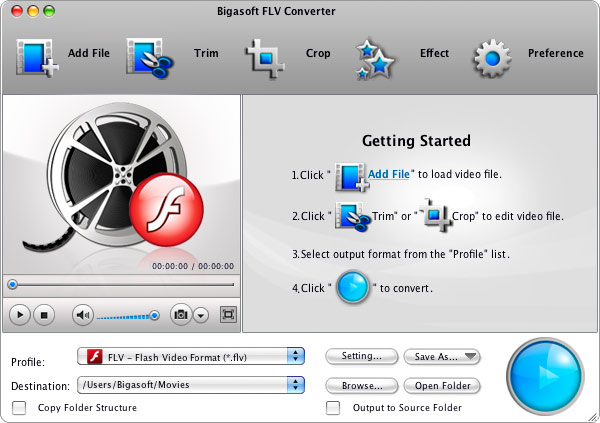
Click the "Profile" drop-down button to select AVI - Audio-Video Interleaved (*.avi) from "General Video" Category.
Tips:
  • Usually the default output format is just in AVI format; if you want to make iMovie convert to AVI, just ignore this step.
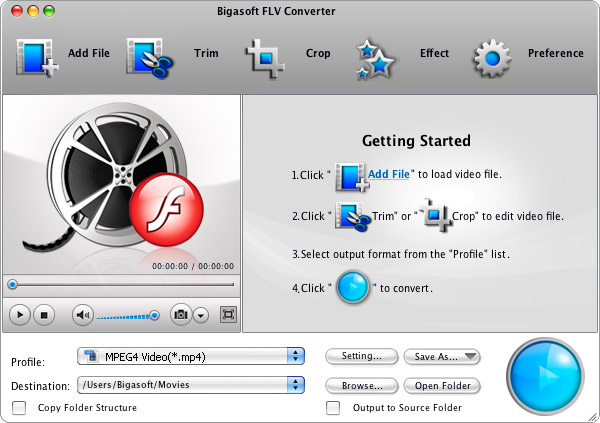
  • If you want to convert iMovie to other video format like WMV, VOB, MPEG-1, or MPEG-2 and etc, just select the desired one from "General Video" Category.
Step 3 Convert iMovie to AVI
Click "Convert" button to start converting iMovie to AVI format, it will be finished with fast conversion speed and high output video quality.

Conclusion
It is that easy to export and convert iMovie to AVI with good video quality and small output file size with the above powerful iMovie to AVI Converter and the step by step guide. Wait no more, just free download this ideal software to make iMovie convert to AVI, or make QuickTime/iTunes/FCP/FCE/iPad convert to AVI, or even convert iMovie to WMV, MPEG, MKV, VOB, FLV and etc.

Resources
FREE Download and Start Enjoying Now (27.68MB)
Learn more about Bigasoft AVI Converter for Mac ...
Got a Windows? Free download your copy here (10.67MB)
Learn more about Bigasoft AVI Converter ...
 
iMovie Export WMV - Convert iMovie to WMV for Play on Windows

Tuesday 13 March 2012

How to Convert FLV to MP4 on Mac OS X (including Lion) or Windows?

Have you downloaded some interesting videos from YouTube? And have you been bored that could not play them on your iPad, iPhone, iPod touch, iPod nano, Archos AV500, Archos AV700, Archos Gmini402, iRiver PMP-100, Creative Zen, Vision, Zune, and so on? Of course, portable MP4 player won't play FLV format. Then we need to convert FLV to MP4 for more widely accepted.
Bigasoft FLV Converter (for Mac), the professional FLV to MP4 converter, can easily convert FLV to MP4 without losing any quality. And you can also have a free try at first.
The following is a step-by-step guide on how to convert FLV to MP4 (MPEG-4) with the powerful FLV to MP4 converter for Mac OS X Lion or Windows.
Preparation
Free download, install and run Bigasoft FLV Converter (Windows Version, Mac Version), the following interface will turn up.
Screenshot of Bigasoft FLV Converter for Mac
Step 1 Import FLV files
Click "Add File" button to import FLV files, and then click "Open".
Tips: You can also import FLV files by dragging FLV files directly into the main interface.
Import FLV files to Bigasoft FLV Converter
Step 2 Set output MP4 format
Select suitable MP4 format from the "Profile" drop-down list.
Guide on How to Convert FLV to MP4 on Mac Lion or Windows
Step 3 Set output path
Click "Browse..." button to specify a location for the converted files. If you want to open the output folder, you can just click "Open Folder" button.
Step 4 Start the conversion
Click "Start" button to begin converting FLV to MP4. It will be finished with high output quality and converting speed.
Tip 1 Trim
"Trim" function helps you convert only your wanted clips by setting the start time and the end time.
Advanced video editing function before converting FLV to MP4
Tip 2 Crop
"Crop" function is for you to cut off the black edges of the original movie video.
Tip 3 Effect
Effect function is for you to customize video like adding watermark, subtitle, audio track, artistic effects.
Tip 4 Preference
"Preference" function is for you to set output effects, image type, CPU usage and action after conversion done, etc.
Tip 5 Settings
"Settings" function is for you to set parameters of your output files such as frame rate, resolution, channels, sample rate, video/audio codec, video/audio bitrates, etc.
Enjoy
Just free download Bigasoft FLV Converter (for Mac) to enjoy your favorite YouTube videos on your iPod, iPhone, Zune or other portable players.

Resources
 
FREE Download and Start Enjoying Now (10.58MB)
Learn more about Bigasoft FLV Converter ...
Got a Mac? Free download your copy here (27.50MB)
Learn more about Bigasoft FLV Converter for Mac ...

Tuesday 28 February 2012

Import M2T, M2TS or MTS to iMovie

As the file extension of camcorder AVCHD video, MTS, M2T or M2TS often failed to import to iMovie. The following article will describe the reason as well as provide a simple way to successfully import M2TS to iMovie, M2T to iMovie or MTS to iMovie.
Why Failed to Import MTS, M2T, M2TS to iMovie?
Reason 1: MTS, M2T or M2TS video are only compatible with iMovie which run on a Mac with an Intel-based Core Duo processor or better.
Reason 2: It is allowed to import individual AVCHD MTS or M2TS directly from the camera, but it is not possible to import single MTS or M2TS files that are on the hard drive unless the file structure from the memory card is in place.
Reason 3: Due to the wide range of media types, and the different ways manufacturers store video on these media types, not all AVCHD (in .mts, m2t, or m2ts) camcorders are compatible with iMovie.
How to Successfully Import M2T, M2TS, MTS to iMovie?
Converting MTS, M2T, or M2TS to iMovie format will be an ideal solution. In this way, it is just easy to import all kinds of AVCHD MTS, M2T, or M2TS to all versions of iMovie whatever the Mac is an Intel-based Core Duo processor or not, whatever the individual AVCHD clips is from the camera or from the hard drive.
Bigasoft iMovie Converter is just the right MTS to iMovie Converter. It can easily convert all kinds of AVCHD files to MP4, MOV, or DV for fast import to iMovie like convert MTS to iMovie, convert M2T to iMovie, and convert M2TS to iMovie. Besides it also support converting other video format like AVI, MPG, VOB, WMV, FLV, MKV, DivX, Xvid,3GP, MOD, TOD, MXF and etc to iMovie.
Detailed Guide to Convert and Import MTS to iMovie?
The following is a step by step guide on how to convert MTS to iMovie format for fast import to iMovie. It also applies to convert and import M2TS to iMovie or M2T to iMovie.
Preparation: Free download and run Bigasoft iMovie Converter for Mac
Free download the powerful MTS to iMovie Converter – Bigasoft iMovie Converter for Mac, install and run it, the following interface will pop up.

Step 1 Add MTS file
Firstly, make sure the MTS file has been copied to the Mac, then click "Add File" button to import this MTS video to this powerful MTS to iMovie Converter. Or you can simply drag the MTS file directly to the main interface of this MTS to iMovie Converter.
m2ts to imovie
Step 2 Set iMovie supported format
Click "Profile" drop-down button to select iMovie supported video format like iMovie Video MPEG-4(*.mp4) from "General Video" category, you can also select other imovie compatible format like DV or MOV.
In order to import high definition MTS/M2T/M2TS video to iMovie with almost no loss of video quality, you need to select iMovie HD Video MPEG-4(*.mp4) as output format from "HD Video" category. To get more perfect effect, click "Settings…" button to set preferable high resolution as you like.
Step 3 Convert MTS to iMovie
Click "Convert" to start and finish converting MTS to iMovie supported format.
Step 4 Import MTS to iMovie
First start iMovie, then choose File > Import > Movies…, to import the converted MTS into iMovie.
import m2ts to imovie
Conclusion
With the above step by step guide, it is just easy to convert and import M2TS to iMovie, MTS to iMovie and M2T to iMovie. It will be just a piece of cake to edit various MTS, M2T, and M2TS camcorder video file in iMovie.
Resources
M2TS to iMovie – Convert and Import M2T, M2TS or MTS to iMovie

How to Convert AVCHD MTS/M2T/M2TS to Apple ProRes?

Convert and Play MKV in iTunes

Sunday 12 February 2012

How to Import VOB to iMovie from DVD's Video_TS folder or Import VOB to iMovie from Mini DVD

A VOB file (Video Object) is a container format in DVD-Video media. It is the file type to store video on a DVD disc. Now it is also used to store video on a Mini DVD for Camcorder. Sometimes, we need to edit DVD VOB or Camcorder Mini DVD VOB video files with iMovie. Unfortunately, when try to import VOB to iMovie, iMovie always refuse to import VOB files, let alone to open VOB in iMovie for editing.
The reason why iMovie cannot import VOB files is that VOB is not a supported video format for iMovie. iMovie is designed to work with the following video formats: MPEG 4 Simple Profile, DV, DV Widescreen, HDV 1080i (25 and 30 fps), HDV 720p (25 and 30 fps), iSight. In order to successful import and open VOB in iMovie, it is better to convert VOB files to one of the above iMovie supported format.
Bigasoft iMovie Converter is just the right VOB to iMovie conversion software. It can easily convert VOB files from DVD disc or Camcorder Mini DVD disc to iMovie supported MPEG-4 or DV format. Then it is just easy to import VOB to iMovie for editing. Besides, it also helps to convert and import other video formats like AVI, MKV, AVCHD, WMV, MPG, MXF, YouTube, FLV, F4V, ASF, SWF, MTS, M2TS, M2T, TS, TOD, MOD, OGM, OGV, 3GP and etc to iMovie.
Moreover, this powerful VOB to iMovie Converter itself is a VOB editor. It can merge several VOB files into one; trim only a segment of VOB video; crop VOB video, rotate VOB videos in landscape and vertical orientation; customize VOB file such as add subtitles and audio tracks to videos, add custom text and image and etc.
Step-by-Step Guide on How to Import VOB to iMovie
The following will show a step by step guide on how to convert, edit and import VOB files to iMovie '11, '09, '08, or HD with the help of the powerful VOB to iMovie Converter.
Make Preparation:
Preparation 1: Copy your VOB files from DVD disc or Mini DVD to specific folder on your Mac.
Preparation 2: Free download the professional VOB to iMovie Converter - Bigasoft iMovie Converter for Mac, install and run it, the following interface will pop up. (Notes: If the VOB files are protected, you need to free download Bigasoft DVD to iMovie Converter instead of Bigasoft iMovie Converter.)

Step 1 Load VOB files
Click "Add File" button to load VOB files from your specific folder which stores the just copied VOB files. Or just simply drag and drop the VOB folder to Bigasoft iMovie Converter's main interface.

Step 2 Set iMovie format and define destination folder
Click "Profile" drop-down button to select iMovie supported video format like iMovie Video MPEG-4 (*.mp4) from "General Video" category.
Click "Browse..." to set the destination folder for the converted VOB files.
Step 3 Edit VOB files (optional)
Click "Trim" button to set desired video segment for conversion
Click "Crop" button to crop the unwanted video footage or remove black bars to focus area
Click "Effect" button to rotate VOB videos, add subtitles/audio tracks/text or image watermark/artistic effect to VOB files.
To merge several VOB files into one: select the VOB files that you want to merge in the task list, and then in the context menu, click "Merge Selected into one"; the merged file will show like "MergeX.mp4". You can double click the name to rename the merged file.
Step 4 Finish VOB to iMovie Conversion

Click "Convert" to start and finish converting VOB video to iMovie supported video format.
Step 5 Import VOB to iMovie
First start iMovie, then choose File > Import > Movies..., and then navigate to the folder where your converted VOB file is located, finally select (highlight) the converted VOB file, create a new event and click "Import" button.
Conclusion
It is just easy to import VOB files to iMovie with the above step by step guide. This guide also applies to import other video formats including AVI, MKV, WMV, MTS, MPG, 3GP, MXF and more to iMovie.
Resources
How to Import VOB to iMovie