Wednesday 20 April 2011

How to Insert iMovie Video into Microsoft PowerPoint Presentation?

This article describes how to insert iMovie (including iMovie '11/'09/'08) video into PowerPoint Presentation on Mac and embed iMovie video clips into PowerPoint Presentation. The inserted video can be played on any Mac and PC. You will never be afraid you or your PPT viewers cannot play your elaborate PPT video.

According to Microsoft official site, one could not insert iMovie video because the video format is what PPT does not support to be embedded. PPD compatible video formats include files with the extension of .asf, .avi, .mpg, .mpeg, .wmv, .wmv, .asf, .avi files are unplayable on a Mac. The .mpg files can be played on both PC and Mac. Thus .mpg is the idea format for us to insert into PowerPoint Presentation which can be played on both a Mac and PC.

you will need:
Download Bigasoft Total Video Converter for Mac and run it.

Make preparation: Export iMovie video that you want to insert into PPT
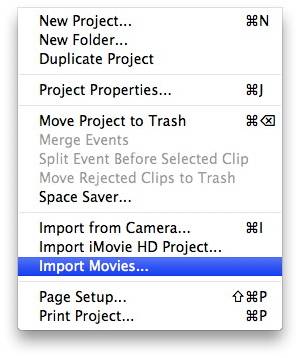
In iMovie, open your project and locate and open the iMovie project that you want to export.
Click "Share" On the File menu, select "Export using QuickTime". In the pop up window, name your movie and choose the folder where you'd like to save it. From the Export dropdown, select Movie to MPEG-4. Close iMovie after the movie is finished saving.

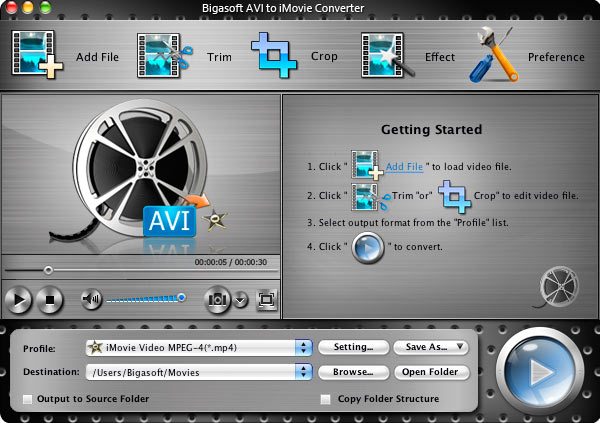
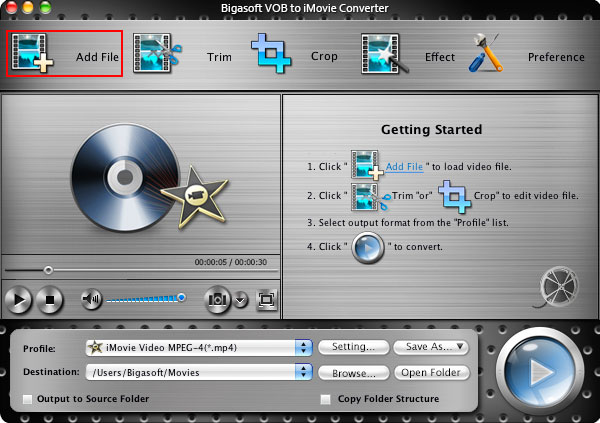
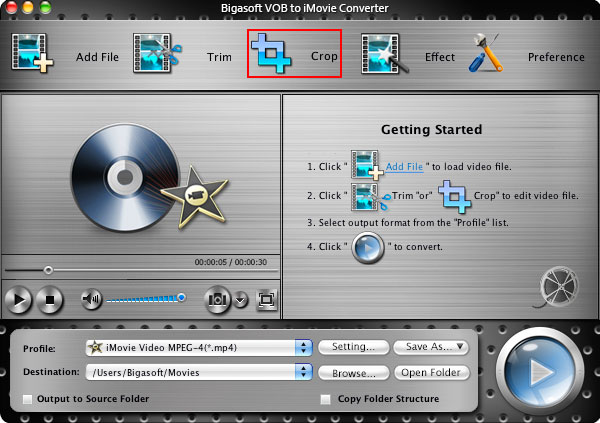
Step 1 Run Bigasoft Total Video Converter for Mac and add files
Click the "Add File" button or directly drag the exported iMovie video clip to import iMovie video.


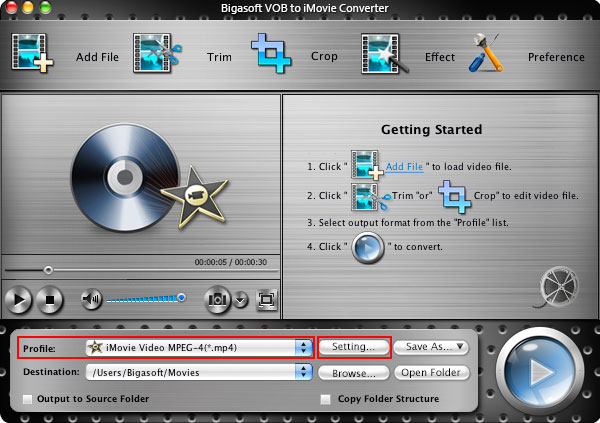
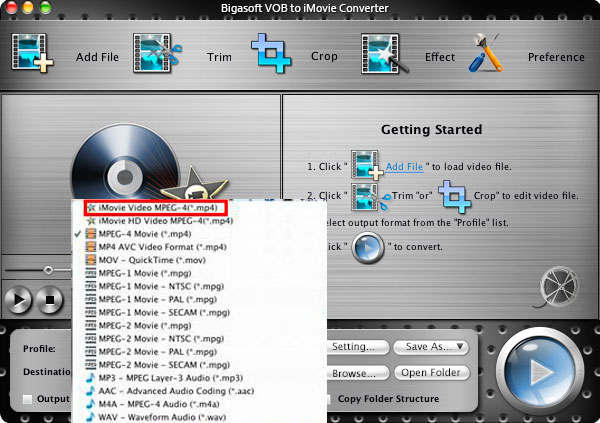
Step 2 Set profile to MPEG-1.
From the profile list, choose MPEG-1 Video (*.mpg) from the "General Video" category.

Step 3 Set MPEG-1 video resolution to 640 by 480
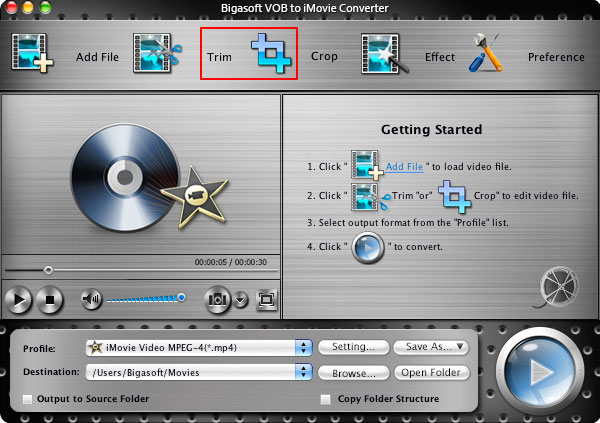
In the "Settings..." windows, select 640*480 from the "Resolution" drop list. You may set lower or higher resolution if you want superior or inferior video quality.

Step 4 Customize iMovie MPEG-4 to MPEG-1 video (Optional)
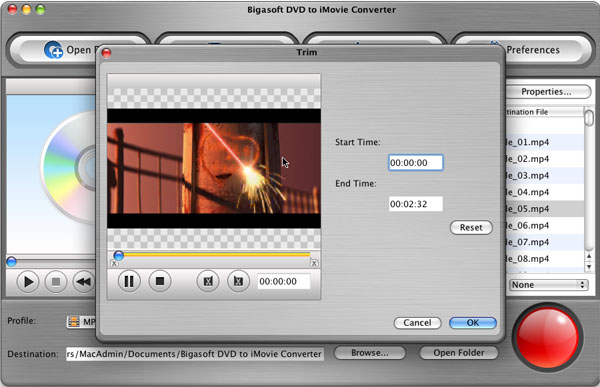
Click "Trim" button, you can achieve converting only your wanted clips by setting the start time and the end time.
Click "Crop" button, you can cut off the black edges of the original movie video.
Click "Preference" button, you can finish setting output effects, image type, CPU usage and action after conversion done, etc as you like.
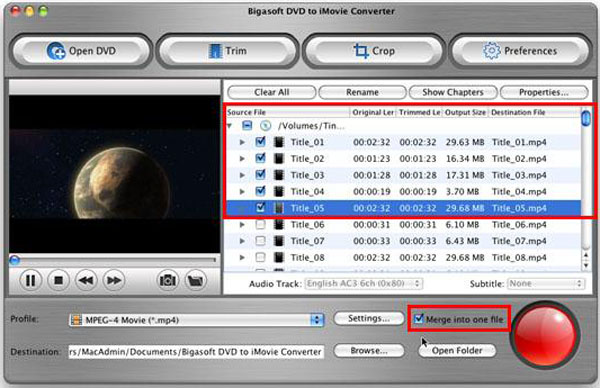
You can also join several chapters into one by checking "Merge into one file" box.

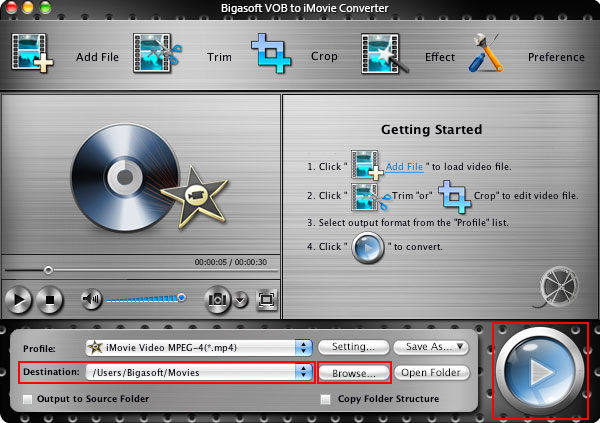
Step 5 Convert MPEG-4 to MPEG-1
Set the destination folder and click "Convert" button to convert iMovie MPEG-4 format to MPEG-1.

Step 6 Insert iMovie video into PPT
Create a folder which contains both your PowerPoint presentation and any embedded movies as separate files to keep the required linked relationship between both PowerPoint and multimedia files.
Now, you can insert the converted MPEG-1 video into PowerPoint and embed iMovie to PowerPoint on Mac or on PC. To insert iMovie (including iMovie '11/'09/'08) video into PowerPoint can be achievable by the assist of Bigasoft Total Video Converter for Mac so easily. You can realize to insert any video clip beyond .asf, .avi, .mpg, .mpeg, .wmv, be it YouTube video, FLV, MKV, MP4, etc to PowerPoint and embed the video.

Tuesday 19 April 2011

Easy Solution to Import AVI to iMovie '08/'09/'11

When trying to import AVI from video camera like Sony, Samsung, RCA, Panasonic, Canon Powershot, Flip Mino etc to iMovie, you may often come across one of the following painful problems: nothing showed up on the iMovie screen; only image in iMovie; only sound in iMovie; or AVI files grayed out and refused to be imported to iMovie. Do you really have no idea to successfully import AVI to iMovie?
Now, with the help of Bigasoft AVI to iMovie Converter for Mac, you can easily achieve to import AVI to iMovie for edit in iMovie. Bigasoft AVI to iMovie Converter for Mac enables you to load any AVI format video to iMovie by converting AVI to iMovie friendly MP4 (MPEG-4), MOV, MP3, WAV, AAC and M4A. With Bigasoft AVI to iMovie Converter for Mac, you can feel free to import AVI to iMovie '08, iMovie '09, iMovie'11.
The following is a step by step guide on how to import AVI to iMovie with the help of Bigasoft AVI to iMovie Converter for Mac.
Step 1 Run Bigasoft AVI to iMovie Converter for Mac
Free download Bigasoft AVI to iMovie Converter for Mac install and run it, then the following interface will pop up.
Screenshot of Bigasoft AVI to iMovie Converter for Mac
 
Step 2 Add AVI to Bigasoft AVI to iMovie Converter
Simply drag and drop AVI files to Bigasoft AVI to iMovie Converter. Or click "Add File" button to locate the AVI files you want to import to iMovie.

Step 3 Set iMovie compatible format
Click the drop-down button on the right side of the "Profile" button to select iMovie compatible format like iMovie Video MPEG-4 Movie (.mp4). If you want the best quality for the output MP4 video, you can choose iMovie HD Video MPEG-4 Movie (.mp4) from the drop-down button.

Step 4 Convert AVI to iMovie compatible format
Click the "Start" button to start converting AVI to iMovie MP4 or iMove MOV.

Step 5 Import AVI to iMovie
Run iMovie, and then click "File -> Import Movies..." to upload the converted AVI to iMovie.
Resources

How to import DVD to iMovie

iMovie (including iMoive '08/'09/'11) just supports MPEG-2, DV, HDV, QuickTime Movie and MPEG-4. In order to import DVD to iMovie, you need to rip your DVD disc to one of the above video format (MPEG-4 is recommended). The article will guide you step by step to rip DVDs to iMovie video MPEG-4, rip only a DVD segment or rip a DVD chapter to iMovie, with customize footage and customize size. Then you can freely import movies on the DVD to iMovie '08, iMovie 09, iMovie HD.

Step 1 Free Download and Launch
Download the profressional DVD to iMovie Converter for Mac, install and launch.
The following is the main interface of the software.

DVD to iMovie Converter
 
Step 2 Load DVD disc to the import DVD to iMovie Ripper
Insert DVD disc to your Mac DVD-Rom, then click "Open DVD" button to load the DVD files.
Import DVD to iMovie freely
Step 3 Set output profile as iMovie Video MPEG-4
Click the down list button on the right side of the "Profile" button to set the output format. You can click the "Settings" button to set parameters of your output video effect such as Frame Rate, Video Codec ,Resolution and Video Bitrates, etc.
Import DVD to iMovie
DVD to iMovie
 
Step 4 Convert DVD to iMovie
Specify the destination folder. Click "Convert" button and let the DVD to iMovie Converter to convert DVD to iMovie MPEG-4.
Some usage tips:
Tip 1 Merge
Check chapters you want to rip and you can merge them into integrated one file by checking "Merge into one file" left beside the "Convert" button:
DVD to iMovie, convert DVD to iMovie
Tip 2 Trim
By setting Start time and End time of the video with the "Trim" function you can custom file size or custom DVD clips for conversion.
DVD to iMovie, rip DVD to iMovie
how to import DVD to iMovie
Tip 3 Crop
By using "Crop" function you can cut off the black edges or adjust the playing region of the original movie video to fit for your favor.
DVD to iMovie, the best DVD to iMovie Converter
Tip 4 Preference
"Preference" function is for you to set output effects, image type, CPU usage and action after conversion done.
Tip 5 Settings
"Settings" function allows you to set parameters of the output files such as frame rate, resolution, channels, sample rate, video /audio codec, video/audio bitrates, etc.

Now, you can find the ripped DVD movies from the destination folder and drag and drop it to iMovie (including iMoive '08/'09/'11) project area to edit as you wish.

Resource
How to make iPhone ringtone longer than 40 seconds
How to solve "cannot be played on iPod" error message
How to copy music from iPod to PC
Convert Movie to Samsung Format H.264 and Transfer to Samsung Galaxy
Practical Solution to Download and Import YouTube to iMovie